
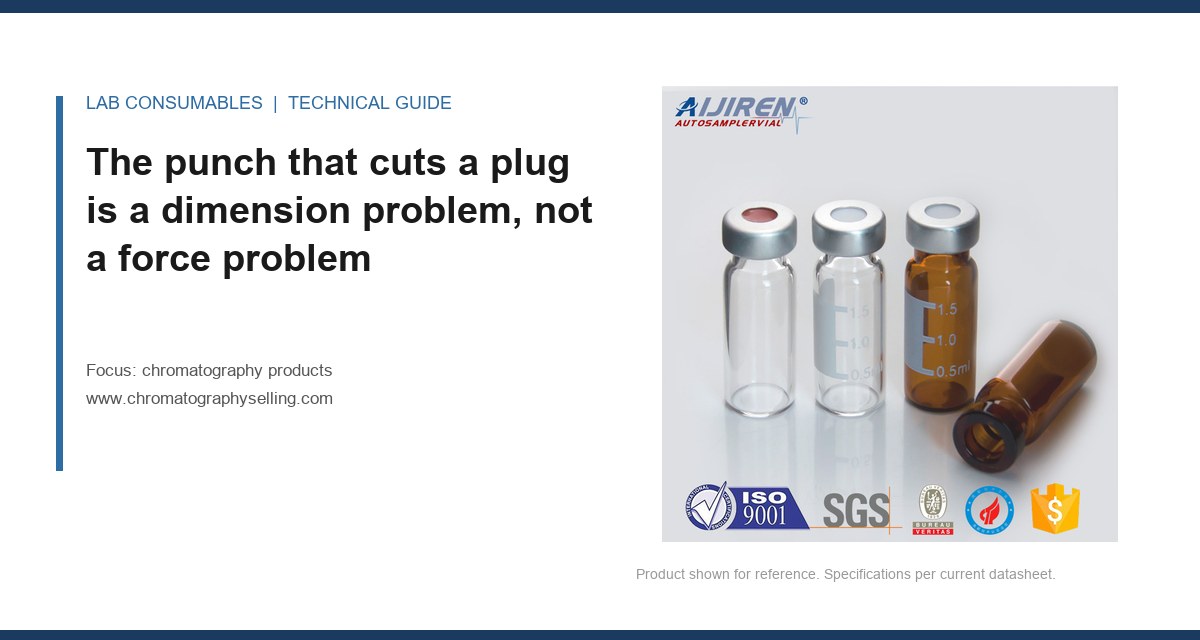
I pulled a 2 mL autosampler vial out of the tray last Tuesday after a 96-injection sequence and found a crescent-shaped plug of silicone sitting in the bottom of the vial. The method still passed, but the RSD on peak area for the internal standard had crept from 0.8% to 2.3% over the run. That is the signature of chromatography products coring, fragments and needle damage diagnosis, and it starts with a mechanical event, not a chemical one. When a needle punches a septum, it does not always slice cleanly. Under the right conditions, it cuts a disk, pushes that disk into the sample, and leaves behind a needle tip that is no longer round. The debris you find in the vial is a direct readout of what happened at the point of entry.
A septum is a laminate. Most autosampler septa are a PTFE face bonded to a silicone core, sometimes with a third layer. The PTFE layer is typically 0.25 to 0.51 mm thick. The silicone core runs 1.0 to 1.3 mm. When a needle enters, the PTFE layer resists first. If the needle tip is a beveled point, it parts the PTFE. If the needle tip is blunt, chipped, or has a burr from a previous puncture, it does not part the material. It shears it.
Shearing is what produces a core. The needle acts like a hole punch. The edge of the needle wall cuts a disk from the PTFE layer, then drags that disk through the silicone underneath. Silicone is elastic, so it tends to close behind the needle. But the PTFE disk is rigid enough to stay intact. Once the needle retracts, that disk can drop into the sample or into the headspace. Later, the autosampler needle may aspirate it. Or it may sit in the vial and block the needle on a later injection.
The dimensions that matter here are needle outer diameter, needle tip geometry, and septum thickness. A 23-gauge needle has an outer diameter of 0.64 mm. A 26-gauge needle is 0.46 mm. The septum hole after puncture is not the same as the needle OD. Silicone recovers, so the effective hole is smaller. But if the needle tip is damaged, the cutting edge is no longer a clean bevel. It becomes a ragged annulus. That annulus punches instead of parts.
I have measured needles under a 20x loupe after as few as 12 punctures. The bevel edge shows a rolled lip. That lip is enough to start coring a 0.25 mm PTFE face. The fix is not a stronger needle. It is a needle with an intact tip profile and a septum with a PTFE layer thick enough to resist shearing but thin enough to part cleanly. A 0.51 mm PTFE face cores less often than a 0.25 mm face under the same needle, but it also requires more insertion force. That tradeoff is real.
What the debris tells you under a loupe
You cannot diagnose coring by looking at the vial with the naked eye. A 0.5 mm disk of PTFE is translucent and often clings to the vial wall. You need a 10x to 20x loupe and a bright light. Here is what I look for.
A clean crescent or full disk of PTFE means a shear cut. The edges will be sharp, and the disk will lie flat. This is a needle tip problem. The bevel has dulled or the tip has a burr. The septum itself may be fine. A ragged piece of silicone with no PTFE layer attached means the needle tore the silicone core after passing through the PTFE. That points to a needle with a hooked tip, or a needle that entered at an angle. A mixed fragment, PTFE on one side and silicone on the other, means the needle carried the PTFE disk into the silicone and then pulled both out on retraction. That is the worst case, because it means the needle tip is acting like a scoop.
Color matters too. White or off-white fragments are PTFE. Gray or translucent fragments are silicone. Red or brown fragments are from a septum with a colored silicone layer, common in some low-bleed formulations. If you see black specks, that is not coring. That is needle coating or vial cap debris, and it has a different source.
I keep a reference set of fragments in my lab. A known PTFE disk from a coring test, a silicone tear, and a mixed fragment. When a customer sends me a photo of debris, I compare it to the reference set. It takes 30 seconds and it narrows the cause to needle, septum, or both. The loupe is the cheapest diagnostic tool in chromatography. A 20x triplet loupe costs under $40. It has saved me more money than any other single tool.
For a broader look at how chromatography products fail in the field, we keep a running library of physical evidence. Coring is one of the few failure modes that leaves a piece you can hold. That makes it easier to diagnose than seal loss with no visible debris, which is a different article.
Needle and guide dimensions that cause coring
The autosampler needle is not the only part that punches holes. The needle guide in the cap, the septum thickness, and the cap crimp all interact. A guide that is off-center by 0.2 mm changes the entry angle. The needle then enters at a slight tilt. A tilted needle cuts an oval hole, not a round one. The oval hole has two stress points. Those points tear instead of part. That tear is what produces fragments.
Here are the dimensions I check when a customer reports coring:
- Needle OD vs. guide ID: the guide hole should be 0.1 to 0.2 mm larger than the needle OD. A 0.64 mm needle needs a guide ID of 0.74 to 0.84 mm. If the guide is tighter, the needle rubs. Friction heats the needle and shaves metal or septum material. If the guide is looser, the needle wanders and enters off-center.
- Needle tip bevel length: a standard bevel is 12 to 15 degrees. A shorter bevel, under 10 degrees, acts like a blunt punch. A longer bevel, over 18 degrees, is fragile and bends on contact with a hard cap.
- Septum thickness: a 1.0 mm septum is marginal for a 23-gauge needle at 50 punctures. A 1.3 mm septum extends the life. But thickness alone does not stop coring. The PTFE face thickness is the critical layer.
- Crimp depth: a cap crimped too tight compresses the septum. The PTFE layer buckles. A buckled PTFE layer cores on the first puncture. Target crimp depth for an 11 mm aluminum cap is 0.5 to 0.6 mm below the cap skirt. I use a crimp gauge, not feel.
The relationship between needle OD and septum hole is not linear. A 0.64 mm needle in a 1.3 mm septum leaves a hole that silicone can close. But after 20 punctures, the silicone loses recovery. The hole stays open. Then the needle enters through an existing hole, and the PTFE layer is no longer the first point of contact. The needle tip hits the edge of the old hole. That edge is already torn. The needle catches it and rips it wider. Coring accelerates after puncture 20, not before.
I have a customer who runs 400 injections per day on a single septum. That is not a typo. They use a 1.3 mm septum with a 0.51 mm PTFE face and a 26-gauge needle with a 15-degree bevel. The septum lasts 400 punctures. The same customer tried a 1.0 mm septum from a different supplier. It cored at puncture 60. The difference was the PTFE face thickness and the needle tip condition. Not the silicone. Not the cap.
Field case: the 96-well plate that ate needles
A contract lab running a USP monograph assay called me about needle damage. They were replacing autosampler needles every two weeks. Each needle cost $180. The symptom was a bent tip and a visible burr under a loupe. The method used a 96-well plate with pre-slit silicone mats. The needle was a 23-gauge, 50 mm length, cone-tip style.
I asked them to measure the mat thickness and the well depth. The mat was 1.5 mm thick. The well depth was 8.0 mm. The needle travel was set to 9.5 mm. That meant the needle was bottoming out in the well on every injection. The tip hit the bottom of the polypropylene well, rolled the bevel edge, and then punched through the silicone mat with a burr. The burr cored the mat on the next injection.
The fix was to set the needle travel to 7.5 mm. That left 0.5 mm of clearance above the well bottom. Needle life went from two weeks to three months. The coring stopped. The debris in the wells disappeared. The fix cost nothing. The diagnostic cost was a caliper and five minutes.
This is why I always ask for the needle travel setting when coring is reported. The needle guide and the septum are only part of the system. The needle tip is a consumable. It wears against every surface it touches, including the bottom of the vial or well.
Field case: the PTFE disk that passed the visual check
A pharmaceutical QC lab sent me a batch of 2 mL vials with 9 mm caps. They found white fragments in 12 vials out of 200. The fragments were visible only after the vials were sonicated. The lab manager suspected the septum supplier. I asked for a photo. The fragments were full disks, 1.5 mm in diameter. That is larger than the needle OD. A 23-gauge needle is 0.64 mm. A 1.5 mm disk cannot come from a 0.64 mm needle.
I asked them to measure the cap crimp. The crimp depth was 0.9 mm. That is too deep for a 9 mm cap. The correct depth is 0.4 to 0.5 mm. The over-crimp compressed the septum so hard that the PTFE layer delaminated from the silicone core. When the needle entered, the PTFE layer was already separated. The needle pushed a large piece of PTFE into the vial. The needle was not the cause. The crimp tool was.
The fix was to recalibrate the crimper and replace the crimp head. The crimp head had worn, and the operator had compensated by squeezing harder. The result was a 0.9 mm crimp depth. After recalibration, the fragments disappeared. The same septum, same cap, same needle. No coring.
This case is a reminder that coring is a system failure, not a component failure. The septum gets blamed most often. But the needle tip, the guide, the crimp, and the travel setting all contribute. If you replace the septum without checking the other four, the coring comes back.
A decision checklist for coring diagnosis
When I get a coring call, I run through this list in order. It takes 15 minutes and it identifies the cause in most cases.
| Check | Measurement | Pass range | Fail action |
|---|---|---|---|
| Needle tip under 20x loupe | Bevel edge condition | Clean, sharp, no burr, no roll | Replace needle or re-polish tip |
| Needle OD vs. guide ID | Caliper measurement | Guide ID 0.1 to 0.2 mm larger than needle OD | Replace guide or needle to match |
| Needle travel depth | Setpoint vs. vial depth | 0.5 to 1.0 mm clearance above vial bottom | Adjust autosampler Z-axis setting |
| Crimp depth | Crimp gauge on cap skirt | 0.4 to 0.6 mm for 9 mm and 11 mm caps | Recalibrate crimper, replace worn head |
| Septum PTFE face thickness | Micrometer on cross-section | 0.25 to 0.51 mm, uniform across face | Switch to a septum with thicker or more uniform PTFE |
| Puncture count on septum | Injection log | Under 50 for 1.0 mm septum, under 100 for 1.3 mm septum | Replace septum more often or use a pre-slit septum |
This checklist is the fastest way to separate a needle problem from a septum problem from a cap problem. I have used it on hundreds of calls. It works because it forces you to measure, not guess. Guessing leads to replacing the wrong part and the coring comes back.
For a wider selection of vials with caps that match specific autosampler needle dimensions, I keep a cross-reference table. The cap and septum combination matters more than the vial glass. A mismatched cap on a good vial will core just as fast as a bad septum.
Pre-slit septa are not a universal fix
A pre-slit septum has a cut through the PTFE face and partway into the silicone. The needle follows the slit instead of punching a new hole. That eliminates coring from a damaged needle tip, because the needle never has to cut the PTFE. But pre-slit septa have their own failure mode. The slit is a path for solvent vapor to escape. If the slit is too wide, the vial loses seal. If the slit is too narrow, the needle still tears the edges.
I use pre-slit septa for high-throughput methods with over 100 injections per vial. The needle tip stays sharper longer because it does not cut PTFE on every entry. But I do not use pre-slit septa for volatile methods with a 12-hour hold time. The vapor loss is measurable. A 2 mL vial with a pre-slit septum and 1 mL of dichloromethane loses 5 to 8% of solvent over 24 hours at room temperature. That is unacceptable for a low-level EPA method.
The choice between pre-slit and solid septa is a method decision. If your method tolerates some vapor loss and you run more than 50 injections per vial, pre-slit is the right call. If you run volatile compounds or long hold times, solid septa with a clean needle are safer. The coring risk with solid septa is manageable if you replace the needle on schedule and check the crimp depth.
I have seen labs switch to pre-slit septa to stop coring, then report a new problem: peak area drift on volatile analytes. The drift was not the septum. It was vapor loss through the slit. The fix was to go back to solid septa and fix the needle. Coring and vapor loss are two sides of the same seal problem. You cannot fix one without understanding the other.
Needle replacement schedules that prevent coring
A needle is a wear item. The tip degrades with every puncture. The rate of degradation depends on the septum material, the needle material, and the entry speed. A 316 stainless steel needle in a silicone septum lasts 200 to 400 punctures before the bevel edge shows visible wear. A PTFE-faced septum wears the needle faster. The PTFE layer is harder than silicone. The needle tip hits it on every entry.
I replace autosampler needles every 500 injections, regardless of appearance. That is a conservative number. Some labs push to 1,000. But the cost of a needle is $150 to $250. The cost of a failed sequence from coring is much higher. A 96-injection sequence that fails at injection 80 wastes 80 samples, 80 vials, and the analyst time to repeat it. The needle replacement is cheap insurance.
The needle coating matters too. Some needles are coated with a fluoropolymer to reduce carryover. The coating wears off at the tip first. Once the coating is gone, the bare stainless steel is exposed. That exposed tip is more likely to pick up a burr. I have seen coated needles core septa at puncture 100 because the coating failed early. The fix is to inspect the tip under a loupe every 100 injections, not just at the replacement interval.
For a deeper look at how Aijiren handles needle and septum compatibility, I have a reference document that lists needle OD, guide ID, and septum thickness for the major autosampler brands. The numbers are specific. A 0.64 mm needle in a 0.74 mm guide is fine. A 0.64 mm needle in a 0.69 mm guide is not. The difference is 0.05 mm, and it is enough to cause rubbing and coring.
How to read the puncture site after coring
After you find debris in a vial, do not throw the septum away. Look at the puncture site under a loupe. The hole tells you what happened.
A clean round hole with no tears means the needle was sharp and the entry was perpendicular. The coring debris came from somewhere else, likely the needle bottoming out or a delaminated PTFE layer. An oval hole means the needle entered at an angle. The guide is off-center or the needle is bent. A hole with a flap of PTFE hanging from one edge means the needle tip was dull and pulled the PTFE layer on retraction. A hole with radial tears means the septum was over-crimped and the material was under tension when the needle entered.
I keep a reference card with photos of each puncture site type. It takes two minutes to match the hole to the cause. This is faster than running a coring test with a new septum and a new needle. The old septum is the evidence. Read it before you replace it.
The puncture site is also a record of the needle condition. If the hole is clean on puncture 1 but torn on puncture 20, the needle degraded over those 20 punctures. That tells you the needle replacement interval is too long. If the hole is torn on puncture 1, the needle was already damaged before it touched this septum. That is a needle handling or storage problem, not a septum problem.
What to do when the debris is not coring
Not every fragment in a vial is a core. I have seen labs misdiagnose a piece of cap liner as a septum core. The cap liner is a separate component, often a PE or PTFE disk inside the cap. If the cap is over-crimped, the liner can crack and shed pieces into the vial. Those pieces look like coring debris but they come from the cap, not the septum.
The way to tell them apart is the shape. A core is a disk or crescent with clean edges. A cap liner fragment is irregular, often with a curved edge from the cap interior. The liner fragment is also thinner than a septum core. A septum PTFE core is 0.25 to 0.51 mm thick. A cap liner is 0.1 to 0.2 mm thick. Measure the fragment thickness. It will tell you the source.
I also see needle coating flakes. A fluoropolymer-coated needle can shed coating into the vial. The flakes are thin, irregular, and sometimes colored. They are not coring. The fix is to replace the needle, not the septum. A coated needle that sheds is a manufacturing defect or a wear issue. Either way, the coating is no longer protecting the needle tip.
For a comprehensive look at vial supplier quality control around cap liners and septum laminates, I recommend asking for the incoming inspection data. A good supplier tests septum thickness, PTFE face thickness, and cap crimp force on every lot. If they do not have that data, you are doing the QC yourself.
Standards and specs that matter for coring
The relevant standards for septum and needle performance are not always obvious. ISO 8362 covers injection containers and accessories for parenteral use, but it is not specific to chromatography. The more useful references are the autosampler manufacturer specs and the USP general chapters on sample handling.
USP chapter 621 on chromatography does not address coring directly. But USP chapter 381 on elastomeric closures for injections sets limits on fragmentation. A septum that meets USP 381 fragmentation limits will core less under autosampler conditions. That is a useful filter when selecting a septum. Ask the supplier for USP 381 fragmentation data. If they cannot provide it, move on.
The U.S. EPA SW-846 methods for waste and materials do not specify septum coring limits either. But they do require that sample integrity be maintained through the analytical sequence. Coring debris in a vial compromises sample integrity. If you are running an EPA method and you find fragments in a sample vial, that sample is compromised. The fix is to prevent the coring, not to filter the debris.
For autosampler-specific guidance, the Agilent chromatography consumables and columns documentation lists needle OD and recommended septum types for each autosampler model. The numbers are specific. A 7693A autosampler uses a 23-gauge needle with a 0.64 mm OD. The recommended septum is a 1.3 mm thick, 11 mm diameter, PTFE-faced silicone. Deviating from those numbers increases coring risk.
Thermo Fisher chromatography and sample handling publishes similar compatibility tables. The TriPlus RSH autosampler uses a 26-gauge needle for some applications. That needle has a 0.46 mm OD. It cores less than a 23-gauge needle in the same septum because the smaller OD cuts a smaller hole. But the smaller needle is also more fragile. A 26-gauge needle bends more easily if the guide is misaligned.
Restek technical resources for chromatography has a useful reference on septum puncture life. Their data shows that a 1.3 mm PTFE-faced silicone septum lasts 100 punctures with a 23-gauge needle before coring risk increases. A 1.0 mm septum lasts 50 punctures. Those numbers match my field experience. I use them as the default replacement interval when a customer has no data of their own.
The decision rule that ends the coring call
When I finish a coring diagnosis, I give the customer one rule: replace the needle on a fixed puncture count, not on visual inspection. A needle looks fine long after the bevel edge has degraded. The loupe check is a confirmation, not a trigger. The trigger is the puncture count. For a 23-gauge needle in a PTFE-faced septum, that count is 500. For a 26-gauge needle, it is 300. For a coated needle, it is 200. Stick to those numbers and coring becomes rare.
The second rule is to measure the crimp depth every time you change the crimper head or the cap lot. Crimp depth is the most underrated variable in coring. A 0.1 mm over-crimp is enough to delaminate the PTFE face and start the coring sequence. A crimp gauge costs $50. A failed sequence costs thousands.
The third rule is to keep the evidence. The debris, the septum, and the needle tip are a record of what happened. Photograph them. Measure them. File them. The next time coring appears, you will diagnose it in half the time. That is the difference between a lab that fights coring and a lab that prevents it.
References & further reading
Related resources from our lab consumables network:
- Chromatography Products at chromatographyselling.com
- Aijiren at aijirentech.com
- Vials With Caps at vialswithcaps.com
- Vial Supplier at vialsupplier.com
External references and standards: