
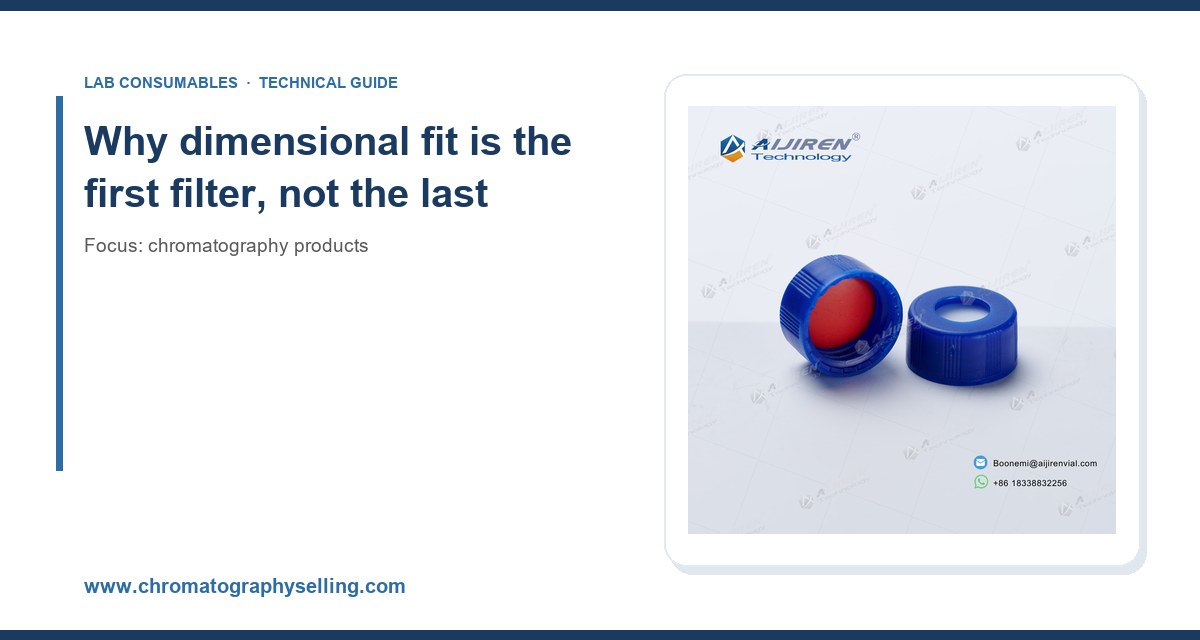
I have watched a lab buy 2,000 autosampler vials that would not seat in their own instrument. The vials were 12 x 32 mm, which is correct for almost every HPLC autosampler on the planet. The problem was the crimp neck. It was a 11 mm finish on a vial body drilled for a 8 mm opening, and the crimper jaws could not close on the shoulder without crushing the neck. That is a $400 mistake in glass and a $900 mistake in lost instrument time. It is also entirely avoidable if you match dimensions to the instrument before you order, not after.
This guide is about the dimensional fit between consumables and the hardware that holds them. Autosamplers and GC inlets are unforgiving. A 0.5 mm error in a septum thickness or a 1 mm error in a vial height turns into a needle crash, a bent syringe, or a run of samples with split peaks. I will cover the specific numbers you need to check, the failure modes that come from getting them wrong, and how to build a dimensional spec sheet for your own lab.
Most buying guides start with material and end with price. That order is backwards. Dimensions are a hard gate. If a vial does not fit the tray, nothing else about it matters. If a septum is 0.5 mm too thick, the needle may not reach the sample. If a ferrule is the wrong taper, the column will leak at the inlet regardless of how well you torque it.
I treat dimensions as pass/fail and everything else as scoring. Material, inertness, lot certification, and price all matter, but only among the products that physically fit. That single change in ordering cuts the evaluation list by 60 to 80 percent before you open a single certificate of analysis.
There is a second reason to start with dimensions. Instruments are fixed assets with a 10 to 15 year life. Consumables are replaced weekly. The instrument defines the envelope, and the consumable has to live inside it. When you buy a new autosampler, the consumable catalog you have been using for a decade may no longer fit. That transition is where most dimensional errors happen.
The vial envelope: 12 x 32 mm and where it breaks
The 12 x 32 mm vial is the de facto standard for HPLC autosamplers. It is defined in the industry literature and referenced by most instrument makers. The 12 mm outside diameter and 32 mm height fit the trays on Agilent, Waters, Shimadzu, and Thermo autosamplers. The standard is loose enough that a few tenths of a millimeter of variation is tolerated, and tight enough that a badly molded vial will jam.
Where the 12 x 32 mm standard actually varies
Three dimensions inside that envelope cause most problems:
- Body diameter: nominal 12.0 mm, with a tolerance that should be held to plus or minus 0.2 mm. Vials at 12.3 mm can bind in a tray with tight spring clips. Vials at 11.7 mm can tilt and cause needle misalignment on some gripper designs.
- Height: nominal 32.0 mm. A vial at 32.5 mm can sit proud of the tray and foul the needle guide. A vial at 31.5 mm can sit low enough that the needle does not reach the bottom of the sample, which matters when you are injecting 5 microliters from a 300 microliter fill.
- Neck finish: this is the dimension that bites. Crimp vials use an 11 mm finish, snap vials use an 11 mm snap ring, and screw vials use a 9 mm thread on a 12 x 32 body. The three are not interchangeable without changing the cap and, in some cases, the tray.
Neck finish and cap compatibility
The 11 mm crimp finish is the most common. It takes an aluminum crimp seal with a 11 mm skirt and a septum, typically 5 mm thick silicone with a PTFE face. The 9 mm screw thread takes a screw cap with a bonded septum, and the torque matters: I use 0.8 to 1.2 N·m on a 9 mm screw cap, which is roughly hand-tight plus a quarter turn. Over-torque crushes the septum into the vial and causes coring on the first puncture.
Snap caps are convenient and I use them for short runs, but they have a lower reseal pressure rating. If your autosampler needle is a 22 gauge (0.72 mm OD) and you are doing 50 injections from one vial, a snap cap will leak before a crimp cap will. For long sequences, crimp wins on seal integrity.
If you are standardizing across a lab, pick one neck finish and buy caps to match. Mixing 11 mm crimp and 9 mm screw in the same tray is a recipe for a needle crash when someone loads the wrong cap. I have seen it happen twice, and both times it cost a syringe and a day of instrument time.
Septum thickness and durometer: the numbers that stop coring
The septum is the part that gets punctured, and its dimensions determine how many injections you get before it fails. Three numbers matter: thickness, durometer (hardness), and pre-slit versus solid.
Thickness
Standard 11 mm septa are 3 mm or 5 mm thick. The 3 mm septum is for short sequences and low-pressure injections. The 5 mm septum is for long sequences and higher injection volumes. The thicker septum gives the needle more material to seal against, but it also reduces the depth the needle can reach. On a vial filled to 300 microliters, a 5 mm septum plus a 11 mm cap takes up enough headspace that a needle set to 2 mm above the bottom may not reach the liquid. Check your needle depth setting against the septum thickness before you switch.
Durometer
Septum hardness is measured on the Shore A scale. A 45 to 55 Shore A silicone is soft enough to reseal after a 22 gauge needle and hard enough not to extrude into the vial. A 70 Shore A septum reseals poorly and tends to core, leaving a plug of silicone in the vial. I have pulled cores out of vials that were 4 mm long. That plug will block a needle or, worse, get injected onto the column.
PTFE-faced septa are the default for HPLC because the PTFE face is chemically inert and does not leach into the sample. The silicone behind it provides the reseal. For GC, a plain silicone or a silicone with a PTFE face on one side is typical. Do not use a PTFE-faced septum on a GC inlet where the needle has to pierce the PTFE: the PTFE is tough and dulls needles faster than silicone alone.
Pre-slit septa
A pre-slit septum has a small slit cut through it so the needle does not have to cut new material on every injection. This extends septum life and reduces coring. The tradeoff is a slightly higher risk of evaporation from the vial during long runs. For a 24 hour sequence at room temperature, pre-slit is fine. For a 72 hour sequence or for volatile analytes, use a solid septum and accept a shorter puncture life.
Puncture counts are a real specification, not marketing. A good 5 mm silicone septum with a PTFE face will take 50 to 100 punctures from a 22 gauge needle before the reseal degrades. A pre-slit septum will take more, but the seal is weaker from the start. I plan on replacing septa every 50 injections for critical work and every 100 for routine work.
Needle gauge, length, and the injection depth problem
The autosampler needle is fixed hardware, but the consumable has to accommodate it. Three needle dimensions matter:
- Gauge: 22 gauge (0.72 mm OD) is standard for HPLC. 26 gauge (0.46 mm OD) is used for small-volume injections and for GC. A 26 gauge needle needs a softer septum to avoid bending, and a 22 gauge needle needs a thicker septum to reseal.
- Length: a standard HPLC needle is 51 mm from the needle guide to the tip. If your vial is shorter than the standard 32 mm, the needle may bottom out before it reaches the sample. If your vial is taller, the needle may not reach the liquid at all.
- Tip style: a beveled tip pierces cleanly; a blunt tip cores. Most autosampler needles are beveled, but check before you buy a batch of septa with a hard PTFE face.
The injection depth is set in the instrument method, not the consumable. But the consumable sets the physical limit. If you set the needle to 2 mm above the vial bottom and your vial has a 1.5 mm thick base, the needle is effectively at 0.5 mm above the bottom. That is close enough to hit the glass. I use a 3 mm clearance for routine work and 1 mm only when the sample volume is under 100 microliters and I need every drop.
GC inlet dimensions: liners, septa, and ferrules
GC inlets are less standardized than HPLC autosamplers, and the dimensional mismatches are more expensive. A split/splitless inlet has three consumable interfaces: the liner, the inlet septum, and the column ferrule. Each has its own dimensions, and each can fail independently.
Liner dimensions
A split/splitless liner is defined by its outer diameter, length, and internal geometry. The common sizes are 4 mm OD x 78.5 mm for Agilent 6890/7890 inlets and 5 mm OD x 78.5 mm for wider-bore applications. The length is set by the inlet body: a liner that is 1 mm too long will not seat, and a liner that is 1 mm too short will leak. I have seen a 78 mm liner used in a 78.5 mm inlet and the leak was small enough to pass a pressure decay test but large enough to shift retention times by 0.05 minutes across a run.
The internal geometry matters for the application. A straight liner with a glass wool plug is for dirty samples. A deactivated liner with a taper is for active analytes. A liner with a 2 mm ID is for split injections; a 4 mm ID is for splitless. Match the liner ID to the injection mode, not the other way around. The Restek technical library has a good liner selection matrix that I still use.
Inlet septum dimensions
GC inlet septa are typically 11 mm or 12.7 mm in diameter and 3 mm or 5 mm thick, depending on the inlet. The Agilent 7890 uses an 11 mm septum; older inlets use a 12.7 mm. The septum is held by a nut, and the torque matters: I use hand-tight plus a quarter turn, which is roughly 1.5 to 2 N·m. Over-torque deforms the septum and creates a leak path. Under-torque lets the septum extrude under inlet pressure.
Bleed is the failure mode to watch. A septum that is too soft will bleed siloxanes onto the column and show up as a rising baseline at high inlet temperatures. A septum that is too hard will not seal. For inlet temperatures above 300 degrees C, use a high-temperature septum rated to 350 degrees C. Standard septa are rated to 250 to 300 degrees C.
Ferrule dimensions
The ferrule is the small cone that seals the column into the inlet or detector. The two common tapers are 15 percent and 40 percent, and they are not interchangeable. A 15 percent ferrule in a 40 percent fitting will leak, and a 40 percent ferrule in a 15 percent fitting will crack the nut. The ferrule material matters too: graphite for high-temperature work, Vespel/graphite composite for general use, and PTFE for low-temperature or reactive analytes.
Ferrule torque is a real number. For a 1/16 inch graphite ferrule, I use 0.5 to 0.7 N·m. For a Vespel/graphite composite, 0.7 to 0.9 N·m. Over-torque crushes the ferrule onto the column and creates a dead volume that shows up as peak tailing. Under-torque leaks. A torque wrench is not optional if you are doing this every day.
Building a dimensional spec sheet for your lab
The most reliable way to avoid dimensional mismatches is to write a one-page spec sheet for each instrument and keep it next to the consumable catalog. I have done this for every lab I have run, and it has cut ordering errors to near zero. The sheet has five columns:
- Instrument and module: make, model, and autosampler or inlet type.
- Consumable: vial, cap, septum, liner, ferrule, or column.
- Critical dimensions: the numbers that must match, with tolerances.
- Reference standard: the GPI, ISO, or manufacturer specification that defines the dimension.
- Approved part numbers: the specific SKUs that fit, with a second source.
For a standard HPLC autosampler, the sheet looks like this:
- Vial: 12.0 x 32.0 mm, body tolerance plus or minus 0.2 mm, neck finish 11 mm crimp.
- Cap: 11 mm aluminum crimp, 5 mm skirt, septa 5 mm silicone with PTFE face, 45 to 55 Shore A.
- Septum: pre-slit for runs over 24 hours, solid for volatile analytes, replace every 50 injections.
- Needle: 22 gauge, 51 mm length, beveled tip, injection depth 3 mm above vial bottom.
- Crimp torque: 0.8 to 1.2 N·m on a 9 mm screw cap; hand crimper for 11 mm crimp.
For a GC split/splitless inlet:
- Liner: 4 mm OD x 78.5 mm, deactivated, single taper, glass wool for dirty samples.
- Septum: 11 mm diameter, 3 mm thick, high-temperature grade rated to 350 degrees C.
- Ferrule: 1/16 inch, 15 percent taper, graphite for high-temperature work, 0.5 to 0.7 N·m torque.
- Column: 0.25 mm ID, 30 m length, 0.25 micrometer film, matched to the liner ID.
The spec sheet is not a substitute for the manufacturer’s documentation. It is a summary that a buyer can use without reading a 200 page instrument manual. The Agilent consumables catalog and the Thermo Fisher chromatography pages are the primary sources for the dimensions. The spec sheet is the translation layer.
Where the standards fit: GPI, ISO, and USP
Dimensional standards for chromatography consumables are less formal than for, say, pipe threads, but they exist. The Glass Packaging Institute (GPI) defines the 11 mm crimp finish and the 13 mm and 20 mm finishes used in older vials. The 11 mm finish is GPI 11, and it is the reference for most crimp caps sold today. If a supplier cannot tell you which GPI finish their vial uses, that is a red flag.
ISO 9001 is a quality management standard, not a dimensional one, but it matters for procurement because it tells you the supplier has a documented process for holding tolerances. A supplier with ISO 9001 certification is more likely to hold a 12.0 mm body diameter to plus or minus 0.2 mm than one without. I ask for the certificate and the dimensional tolerance table before I qualify a new vial source.
USP <1058> covers analytical instrument qualification, and while it does not specify vial dimensions, it does require that the sample handling system be shown to be fit for purpose. A vial that does not fit the autosampler fails that requirement before you run a single injection. The U.S. EPA SW-846 test methods are a useful reference for method-specific requirements: some methods specify a vial size or a septum type, and those requirements override your standard spec sheet.
Troubleshooting checklist for dimensional mismatches
When a run fails and you suspect a dimensional problem, work through this list in order. I have used it for 15 years and it catches the majority of fit-related failures.
- Needle crash or bent syringe: check vial height and neck finish first. A vial 0.5 mm too tall or a cap 1 mm too thick will cause the needle to hit the cap or the tray. Measure the assembled vial and cap height against the instrument specification.
- No sample injected or low response: check injection depth and septum thickness. A 5 mm septum on a vial filled to 200 microliters may leave the needle above the liquid. Verify the needle reaches the liquid with a dye test.
- Peak tailing or carryover: check ferrule torque and liner geometry. An over-torqued ferrule creates dead volume; a liner with the wrong ID creates a poor sample transfer. Re-torque to 0.5 to 0.7 N·m and re-run a standard.
- Rising baseline on GC: check septum bleed. A septum rated to 250 degrees C in a 300 degrees C inlet will bleed. Replace with a high-temperature septum and condition it before use.
- Leak at the inlet: check ferrule taper and torque. A 40 percent ferrule in a 15 percent fitting will leak no matter how hard you torque it. Verify the taper against the fitting specification.
- Coring or plug in the vial: check septum durometer and needle tip. A 70 Shore A septum with a blunt needle will core. Switch to a 45 to 55 Shore A septum with a beveled needle.
- Vial jam in the tray: check body diameter and tray clip tension. A 12.3 mm vial in a tight tray will bind. Measure 10 vials from the lot; if any exceed 12.2 mm, reject the lot.
What I recommend: a dimensional-first buying process
Here is the process I use, in order, and it has saved me more instrument time than any other change in procurement.
Step 1: Document the instrument envelope. For every autosampler and inlet, record the vial height, body diameter, neck finish, needle gauge and length, and septum thickness. Get these from the instrument manual, not from a supplier catalog. The manual is the authority.
Step 2: Write the spec sheet. One page per instrument, with the five columns above. Keep it in the same folder as the consumable catalog and the approved supplier list.
Step 3: Qualify two sources per consumable. A single source is a supply risk and a price risk. Qualify a second supplier against the same dimensional spec, and run a side-by-side test: 50 injections from each, with a standard mix, and compare retention time RSD. I accept a difference of less than 0.5 percent RSD between sources; more than that and I investigate.
Step 4: Buy a sample lot before a full case. A 100 piece sample lot costs less than a full case and tells you more than any certificate. Measure 10 pieces with a caliper, run 50 injections, and check for coring, leaks, and peak shape. Only then buy the case.
Step 5: Audit the lot on receipt. Measure 10 vials from every incoming lot against the spec sheet. Reject any lot where more than 5 percent of the sample falls outside the tolerance. This is a 10 minute check that prevents a week of bad data.
For the consumables themselves, I source from suppliers who publish dimensional tolerances and GPI finishes. Aijiren publishes vial and cap dimensions that map to the 12 x 32 mm and 11 mm crimp standards, and their technical team will confirm a fit against a specific instrument model before you order. Vial Supplier carries the 9 mm screw and 11 mm crimp lines with the septum durometer and thickness listed on the product page, which is what you need for the spec sheet. The full catalog at chromatographyselling.com is organized by instrument compatibility, which is the right axis for this kind of buying.
The takeaway
Dimensional fit is the first filter in consumable selection, not the last. The 12 x 32 mm vial and the 11 mm crimp finish cover most HPLC autosamplers, but the tolerances inside that envelope (body diameter plus or minus 0.2 mm, height 32.0 mm, septum 3 or 5 mm at 45 to 55 Shore A) are where the failures live. GC inlets add liner length (78.5 mm), ferrule taper (15 or 40 percent), and ferrule torque (0.5 to 0.7 N·m) to the list. Write a one-page spec sheet per instrument, qualify two sources against it, buy a sample lot before a case, and audit every incoming lot with a caliper. That process costs a few hours up front and prevents the $400 vial order that will not seat, the bent syringe, and the week of data you cannot use.
References & further reading
Related resources from our lab consumables network:
- Chromatography Products at chromatographyselling.com
- Aijiren at aijirentech.com
- Vials With Caps at vialswithcaps.com
- Vial Supplier at vialsupplier.com
External references and standards: