
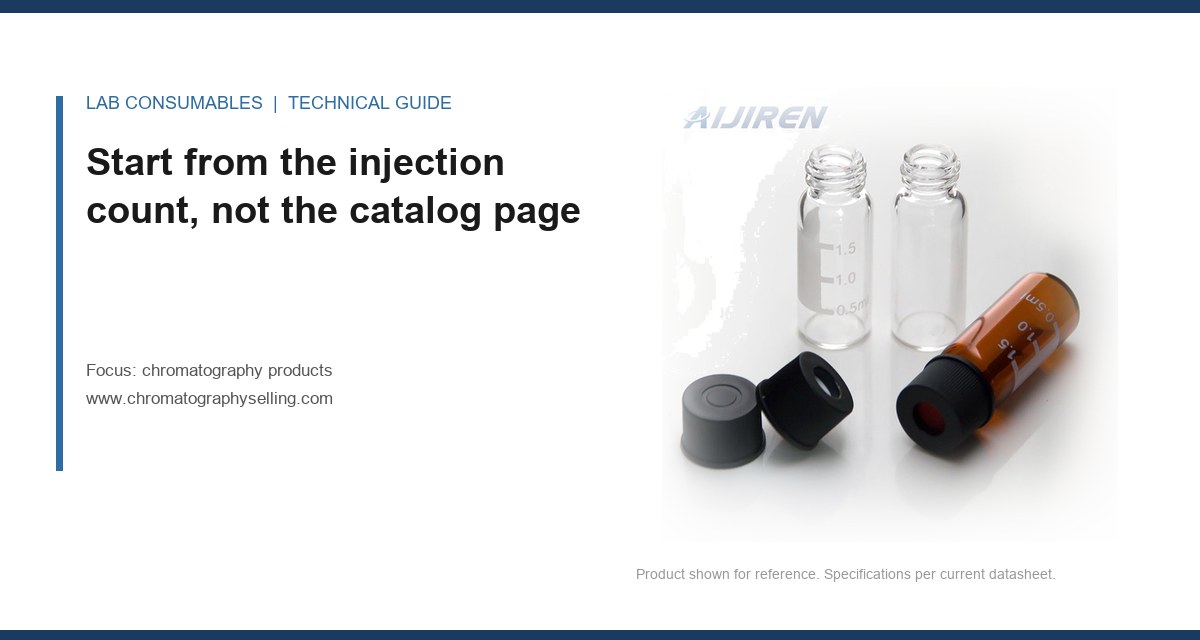
A 2 mL autosampler vial filled to 1.5 mL, run on a 96-position tray at 40 injections per vial, is a 3,840-puncture commitment from one box of 100 septa. That number is where most sizing decisions actually get made, and it is where most of them go wrong. I have watched a lab burn through a case of pre-slit silicone in nine days because nobody multiplied injections by vials by trays before the purchase order went out. The fix was not a better septum. It was arithmetic done at the quoting stage. This guide is about that arithmetic: how to size chromatography products to the real sample volume and the real injection count sitting in front of you, with the fill volume, dead volume, needle gauge, and puncture-life numbers that decide whether your consumable budget holds or folds.
Most buyers work backwards from the sample. They have 240 samples, they buy 240 vials, they buy one box of caps, and they move on. That is the wrong order. The number that governs your consumable spend is total punctures, and total punctures is a product of four things: number of samples, injections per sample (including standards, blanks, and QC duplicates), number of vials per sample if you split, and the septum’s rated puncture life under your needle gauge.
Run the multiplication before you look at a single product page. A method with a calibration curve of six points, a blank, a duplicate, and a matrix spike on 60 samples is not 60 injections. It is closer to 60 samples times two injections (duplicate) plus six standards plus one blank plus one spike, run in sequence with a rinse between each. That is 128 injections from 60 physical samples. If you are using a 6-position tray and 2 mL vials with 1.5 mL fill, you can decide up front whether to run 128 punctures through one vial or split across two. That decision changes how many septa you buy, and it changes how much dead volume you carry into the needle.
Write the arithmetic down. Every consumable sizing decision I have seen go wrong started with a buyer who did not have the total puncture count on paper before the quote.
Worked puncture count for a 60-sample batch
- 60 samples × 2 injections (sample + duplicate) = 120 punctures
- 6 calibration standards × 1 injection = 6 punctures
- 1 method blank + 1 matrix spike = 2 punctures
- Total per batch = 128 punctures
- If run on one vial with a 1.5 mL fill: 128 punctures on a single septum
- If split across two vials: 64 punctures per septum, plus 2 extra septa and 2 extra caps
The split costs you two extra caps and two extra septa. It saves you the coring risk of running a single septum past its rated life. On a pre-slit silicone/PTFE septum rated to 100 punctures at 23 gauge, that split is the difference between staying inside spec and running 28 punctures past it. On a molded PTFE-faced silicone septum rated to 200 punctures, the split is not needed. The rated number on the box is the number you size against, not the number you hope for.
Fill volume is a dead-volume problem disguised as a capacity problem
A 2 mL vial is not a 2 mL vial. The nominal volume is the total internal volume above the bottom of the glass. The usable volume is smaller, and the difference is the dead volume your needle has to reach past. On a standard 12 × 32 mm crimp or screw-thread vial, the internal cavity is roughly 1.5 mL of usable liquid volume with a 6 mm fill height below the septum. Draw 1.8 mL into it and you are pushing liquid into the septum on crimp, or you are leaving a headspace bubble that shifts retention time on the first injection of the tray.
The working rule I use: fill to 60 to 75 percent of nominal volume. For a 2 mL vial, that is 1.2 to 1.5 mL. For a 1.5 mL vial, that is 0.9 to 1.1 mL. For a 4 mL vial, that is 2.4 to 3.0 mL. Below 40 percent fill, the needle may not reach the liquid on a fixed-height autosampler, and you get a partial injection or an air lock. Above 80 percent, the septum contacts liquid on crimp, and you get wicking, evaporation, and a slow drift in concentration across the tray.
Dead volume by vial format
| Vial format | Nominal volume | Recommended fill | Residual dead volume at recommended fill | Minimum needle length to reach liquid |
|---|---|---|---|---|
| 11 mm crimp, 12 × 32 mm | 2.0 mL | 1.2 to 1.5 mL | ~80 to 120 µL | ~12 mm from septum face |
| 9 mm screw-thread, 12 × 32 mm | 2.0 mL | 1.2 to 1.5 mL | ~100 to 140 µL | ~12 mm from septum face |
| 9 mm screw-thread, 12 × 32 mm, wide-mouth | 1.5 mL | 0.9 to 1.1 mL | ~70 to 100 µL | ~10 mm from septum face |
| 13 mm screw-thread, 15 × 45 mm | 4.0 mL | 2.4 to 3.0 mL | ~150 to 200 µL | ~18 mm from septum face |
| 10 mL headspace, 20 × 75 mm | 10.0 mL | 5.0 to 7.0 mL | n/a (headspace method) | n/a |
That residual dead volume is the liquid the needle cannot reach at maximum depth. If your autosampler has a fixed needle depth of 12 mm from the septum face, and your vial is a 4 mL format with a 20 mm internal depth, the needle stops 8 mm short of the bottom and you leave 0.4 to 0.6 mL behind. That is a 20 percent loss on a 3 mL fill, and it is the reason a lab running 4 mL vials on a 2 mL-designed method sees concentration drift on the last injections of the tray. The fix is not a longer needle. It is a smaller vial or a shorter fill height with a shorter needle.
Needle gauge sets the puncture-life ceiling before the septum does
Septum puncture life is not a property of the septum alone. It is a property of the septum, the needle gauge, the needle bevel, and the injection speed. A 22-gauge needle (0.72 mm OD) at 100 punctures on a standard silicone/PTFE septum is a different wear profile than a 26-gauge needle (0.46 mm OD) at the same 100 punctures. The larger needle cores a wider plug, and the plug is what ends up in the needle, not in the vial.
The rated puncture life on the box is almost always quoted at 22 or 23 gauge. If you are running 21 gauge (0.81 mm OD) or 20 gauge (0.91 mm OD), derate by 30 to 40 percent. If you are running 26 or 27 gauge, you can extend 20 to 30 percent, but you pay for it in needle bending and septum coring on the smaller bevel. I have seen a lab run 20-gauge needles through a 100-puncture septum and hit coring at puncture 62. The plug blocked the needle on the 63rd injection, the autosampler aborted, and the run was lost. The septum was not defective. The gauge was wrong for the rated life.
Puncture-life derating by needle gauge
| Needle gauge (OD) | Rated life multiplier | 100-puncture septum, effective life | 200-puncture septum, effective life |
|---|---|---|---|
| 20 G (0.91 mm) | 0.60 to 0.70 | 60 to 70 punctures | 120 to 140 punctures |
| 21 G (0.81 mm) | 0.65 to 0.75 | 65 to 75 punctures | 130 to 150 punctures |
| 22 G (0.72 mm) | 0.90 to 1.00 | 90 to 100 punctures | 180 to 200 punctures |
| 23 G (0.64 mm) | 1.00 (reference) | 100 punctures | 200 punctures |
| 26 G (0.46 mm) | 1.20 to 1.30 | 120 to 130 punctures | 240 to 260 punctures |
Use the derated number, not the box number, when you size. If your method calls for 21-gauge needles and you have 128 punctures per batch, a 100-puncture septum at 0.65 to 0.75 multiplier gives you 65 to 75 effective punctures. That is a septum change every batch, or a split across two vials per batch. The box says 100. The math says 70. Buy to the math.
Case one: the 4 mL vial that lost 18 percent of its analyte by injection 80
A contract lab running EPA SW-846 method 8270 on a 60-sample batch called me about a downward drift in surrogate recovery. The first ten injections of each tray were within 5 percent of nominal. By injection 80, the surrogate was 18 percent low. The instrument was clean. The column was new. The autosampler was calibrated.
The measurement that identified it: they pulled the vial and weighed it before and after the tray. The 4 mL vial had lost 0.21 g over 80 punctures, which is roughly 0.21 mL of solvent, mostly through the puncture channel in the septum. The fill was 3.2 mL, which is 80 percent of nominal. That is above my 75 percent ceiling. The septum was a standard silicone/PTFE at 22 gauge, rated to 100 punctures, but the headspace above the liquid was only 0.8 mL, so the puncture channel sat in a solvent-saturated vapor zone and evaporated faster than a dry septum would. The fix was to drop the fill to 2.6 mL (65 percent), switch to a pre-slit PTFE-faced septum rated to 150 punctures at 22 gauge, and split the batch across two vials. Recovery drift disappeared. The extra cost was 60 extra caps and 60 extra septa, about $18 per batch. The cost of the drift was a re-run of 60 samples, about $1,400 in instrument time and labor.
Case two: the 96-well plate that cored at puncture 210 because the needle was 20 gauge
A high-throughput screening lab running 96-well plates on a 2 mL deep-well format with a 20-gauge needle asked why their silicone mat septa were coring after two plates. The mat was rated to 200 punctures per well at 22 gauge. They were running 192 injections per well (two plates at 96 wells each, one injection per well per plate, plus a QC injection). At 20 gauge, the derating multiplier is 0.60 to 0.70, so the effective life was 120 to 140 punctures. They were 52 to 72 punctures past the derated life on the second plate.
The measurement that identified it: they counted cores in the needle wash station. Eleven cores in 192 punctures on the second plate, zero on the first. That is a 5.7 percent coring rate, which is above the 1 percent threshold I use as a stop signal. The fix was to switch to a 22-gauge needle and a pre-slit mat, which brought the effective life to 200 punctures at 22 gauge and the coring rate to zero. The mat cost went up 12 percent. The lost run cost went to zero. If you are running a 96-well format, size the mat to the plate count times the injections per well, then derate for gauge, then buy to the derated number. Do not buy to the box number.
Sizing the rest of the line: caps, septa, and the torque that decides whether the seal holds
The vial and septum get the attention. The cap and the crimp or screw torque decide whether the seal holds for the tray. A screw-thread cap torqued to 1.5 N·m on a 9 mm thread is a different seal than the same cap hand-tightened to 0.8 N·m. Hand-tightening is the most common cause of evaporation drift I see in the field, and it is the hardest to catch because the cap looks seated.
For 9 mm screw-thread caps, I use 1.2 to 1.5 N·m with a torque screwdriver. For 11 mm crimp caps, the crimper setting is 0.6 to 0.8 mm of crimp depth on a standard crimper, which gives a seal that holds 24 hours at 4 °C without measurable loss. For 13 mm screw-thread caps, 1.5 to 1.8 N·m. Below those numbers, the PTFE-faced liner does not compress against the glass and you get a slow leak. Above those numbers, you crack the cap or deform the liner and you get a different leak. The GPI thread standard (GPI 9-425, GPI 13-425, GPI 11-400) is the dimensional reference for the cap-to-vial fit, and if the cap is not to that standard, no torque value will save the seal.
Consumable sizing checklist
- Total punctures per batch = samples × injections per sample + standards + blanks + QC. Write it down.
- Punctures per septum = total punctures ÷ septa in use. Keep below the derated rated life.
- Fill volume = 60 to 75 percent of nominal. Below 40 percent, check needle reach. Above 80 percent, check evaporation.
- Needle gauge derating: 20 G = 0.60 to 0.70, 21 G = 0.65 to 0.75, 22 G = 0.90 to 1.00, 23 G = 1.00, 26 G = 1.20 to 1.30.
- Dead volume = residual liquid below the needle tip at maximum depth. Match needle length to vial internal depth, not to the catalog.
- Torque: 9 mm screw = 1.2 to 1.5 N·m, 13 mm screw = 1.5 to 1.8 N·m, 11 mm crimp = 0.6 to 0.8 mm crimp depth.
- Coring stop signal: more than 1 percent coring rate, or any visible plug in the needle wash, means the septum is past its derated life.
- Evaporation check: weigh a filled vial before and after a full tray. More than 0.5 percent mass loss means the seal or the fill is wrong.
If you are sourcing vials and caps to those numbers, the vials with caps catalog is a useful place to match format to fill volume, and vial supplier listings give you the GPI thread callouts to check against your autosampler tray. For the full line of septa, caps, and liners, the chromatography products index is the starting point. If you need a custom septum format or a non-standard puncture rating, Aijiren runs custom molding to spec. For method-specific puncture and fill guidance, the U.S. EPA SW-846 methods and the Restek technical resources library are the two references I check first, and the vendor technical pages at Agilent and Thermo Fisher carry the autosampler-specific needle depth and tray geometry that the arithmetic depends on.
The decision rule: size to the derated puncture count, fill to the middle of the range, and match needle length to vial depth
If you take one rule from this, take this: the number you buy to is total punctures per batch divided by the gauge-derated septum life, rounded up, plus one spare septum per tray. Fill volume is 60 to 75 percent of nominal, never above 80, never below 40. Needle length is matched to vial internal depth minus 2 mm of clearance, not to the tray spec. Torque is 1.2 to 1.5 N·m on 9 mm screw caps and 0.6 to 0.8 mm crimp depth on 11 mm crimp caps. Run the arithmetic before the quote, not after the first lost tray. The septum will tell you when it is past its life. The arithmetic tells you before it does.
References & further reading
Related resources from our lab consumables network:
- Chromatography Products at chromatographyselling.com
- Aijiren at aijirentech.com
- Vials With Caps at vialswithcaps.com
- Vial Supplier at vialsupplier.com
External references and standards: